Hi there,
I too, have been having some issues recently trying to get my local dev (windows) to work consistently with the way our staging/prod servers look / work.
I don’t know if you like / use docker at all - but I just found this;
And am so far loving it.
The instructions are clear and straight forward - and the project - takes care of all the “setting up” work.
You don’t have to compile anything - do any weird “path” / “system environment” edits.
(I haven’t managed to get it working with multiple apps, yet… but for one it is a dream.)
(At the moment I am running a different container for each app)
The instructions are really clear and allow you to reconstruct the paths in the docker container - to match your prod environment - irrespective of how they look locally on your “host” machine.
I tried getting IIS working - and did manage to do it.
Only… I had to reinstall Lucee - after I fatally hacked up the configs and the Jar versions (testing for a bug) - and couldn’t for the life of me remember what I did / how I did it - to get Lucee working with IIS.
The default Lucee Windows installer - didn’t work for our convoluted app configuration.
(Lucee works fine - but for some reason, that I can’t correct at the moment - I couldn’t get our apps to work properly)
(assuming Windows 10 or 11)
The initial step is to make sure that (if you haven’t) you install WSL - the windows/linux sub-system - which lets you launch a linux terminal / run linux apps on the same machine as Windows.
in a “powershell” window run; wsl --install
make sure it installs “version 2” - if you have 1 installed already you can upgrade to 2, I used;
Install WSL 2
Also you need to install “Docker desktop” for windows;
Install Docker Desktop
So at the moment, all my source code is sitting c:\inetpub\wwwroot<various paths> on my windows laptop, but when you launch your docker container - you can map you windows filepaths into something else in the docker container.
Below is the command I use to create the docker container, after I have built the image.
(All the docker commands are run from “WSL”, so make sure you launch it via command line / powershell / windows icon)
Docker Run
docker container run --add-host dockerhost:`/sbin/ip route|awk '/default/ { print  $3}'` -p 8080:8080 -p 443:443 -p 80:80 \
-v /mnt/c/inetpub/wwwroot/gsn:/srv/www/app/webroot \
-v /mnt/c/inetpub/wwwroot/vxmlsurvey:/srv/www/app/vxmlsurvey \
-v /mnt/c/inetpub/wwwroot/cfmapping:/srv/www/app/cfmapping \
-v /mnt/c/inetpub/wwwroot/dbsetup:/srv/www/app/dbsetup \
-v /mnt/c/inetpub/wwwroot/trigger:/srv/www/app/trigger \
--name myapp-539-8080 gavinbaumanis/myapp-539141
–add-host dockerhost:/sbin/ip route|awk '/default/ { print $3}' : Now you can use “dockerhost” as thehostname in your Lucee Admin Datasources and use your “Windows” installed databnase(s)
-v /mnt/c/inetpub/wwwroot/gsn:/srv/www/app/webroot : /srv/www/app/webroot is where the docker container expects to find your applications root directory - don’t try to change it - just leave it where it is - and live with the convention.
And the remaining -v, mappings are for all my “mappings” that are configured, as normal, in the Lucee administrator.
Because these “source” code paths are on my local/host machine - I can edit my app’s source code with VSCode / Windows IDE of choice, in the Windows path - and have the changes, instantly “seen” by my app - in the Lucee, docker, container… AND I can use GIT / etc from my windows machine.
–name myapp-539-8080 gavinbaumanis/lucee-539141 : this gives the docker container the name “myapp-539-8080” (lucee version 5.3.9 @ port 8080 : but it, can, of course be any name you want) and finally “gavinbaumanis/myapp-539141” is my docker repository (username/image name)
(the image name is defined during the “build” - obviously BEFORE running the container of course!)
(You of course don’t have to - but if you want to, you can “push” your docker image(s) to “Docker Hub” and get them from anywhere / share them with others.
So you can set everything up, once - then share your configured / ready to go IMAGE with everyone else in your team (then they just do the docker run command with the file paths that suit their host machines.
Build command
docker image build .       \
    -t gavinbaumanis/myapp-539141 \
    --build-arg LUCEE_ADMIN_PASSWORD=changeit! \
    --build-arg LUCEE_VERSION=5.3.9.141-RC
-t gavinbaumanis/myapp-539141 : is to “tag”/name the docker image - instead of getting stuck having to use the GUID of the container, all the time.
The build-args are optional.
In my use-case;
–build-arg LUCEE_ADMIN_PASSWORD=changeit : Sets the password for the Lucee Administrator to “changeit” - this can be whatever you want, of course.
–build-arg LUCEE_VERSION=5.3.9.141-RC : is the version of Lucee that you want to install into the container (which happens automatically), also note that if the version on the Lucee downloads page has a “postfix” (BETA/RC/SNAPSHOT) - you have to include that, too, RC in my config.
It might not be readily apparent, but the advantages are;
- You can build as many containers as you like…
** So you can have an identical build for multiple versions of Lucee.
** You can “mess around” in your container’s (linux) and Lucee configs/environment, and simply reload it - to get back to what you had before you “broke it”.
The “only” gotchya - is that of course the initial Build of the image / initial run of the container will NOT have any Lucee configuration (datasources / mappings / scheduled tasks / etc).
So you have to set these up - THEN you have to make sure that you re-save your container - otherwise you will lose your config changes, and you do that, with your container running;
(in WSL)
docker ps; which for me shows;
f633968c40b3 gavinbaumanis/myapp-539141:latest ...
Now that you have the container ID, you clone it (while it is running / after all of your config changes);
docker commit xxxxxxxxxxx gavinbaumanis/myapp-539141, where xxxxxxxx is changed out for the container ID from above : f633968c40b3
docker commit f633968c40b3 gavinbaumanis/myapp-539141
Once all this is done - and TBH it is only a few minutes;
You don’t need the terminal again.
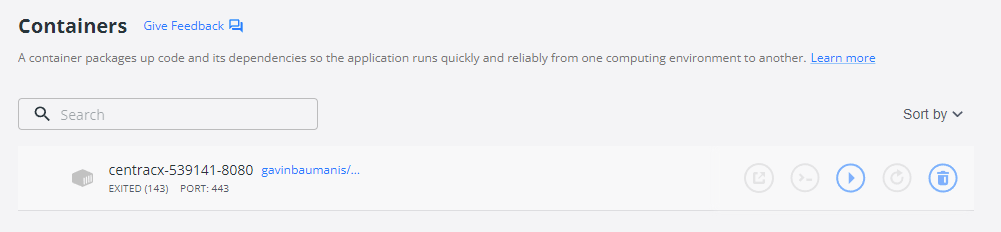
From the Docker Desktop app - simply run your saved container.
(there’s a “play” button - when you hover on the container)
Hope that helps!
Gavin.