Lucee has had support for Docker with the latest and greatest images on Docker Hub for several years now. They are generated as part of the build process by Travis CI and come in a few different variations like different versions of Java, Tomcat, and Lucee.
https://hub.docker.com/r/lucee/lucee
In this post I will cover a different project which makes it easy to build custom Lucee Docker images. The project has three main features, which allow you to specify the following at build-time:
- The Lucee version
- Extensions to be added
- The Lucee Admin password
In addition to those settings, you can also easily map a local directory to the webroot. That allows you to map your application code at run-time and test it on the different Lucee and/or extensions versions.
Prerequisite
The only prerequisite is to have Docker installed. That is required in order to enable the commands docker and docker-compose in your environment.
Getting Started
Grab a copy of the project from https://github.com/isapir/lucee-docker. If you use git, you can go ahead and run git clone and clone it to a local working directory. Otherwise, simply click the green “Clone or download” button on the GitHub page, choose “Download ZIP”, and extract the contents of “lucee-docker-master” to a local working directory.
Open a console window, (Terminal, Command Prompt, etc.), and switch to the working directory. Now you are ready to execute the docker commands.
Building a Docker Image
We build a Docker image using the command docker image build .. That . at the end specifies the directory, and since we call the command from the current directory we pass a dot.
It is often useful to tag the image so you can reuse it easily, and possibly even push (upload) it to your Docker repository, or your account at Docker Hub. You tag an image with the argument -t <username>/<tagname>. To build an image and tag it as lucee5 under my username (isapir), I would use the command:
docker image build . -t isapir/lucee5
Docker will then download the base image of OpenJDK and Tomcat, and install on top of it the version of Lucee as specified in the Dockerfile. It will launch Lucee and run until the onServerStart() event is processed, and then shut it down and save the image. That “warmup” is done at build-time so that when you run the container you don’t have to wait for all of the initial setup.
Building a Custom Version
Building an image of a custom Lucee version is easy. The only piece of information that you need is a full valid Lucee version number, which you can get from the Lucee Download [3] page. For example, at the time of this writing, the snapshot version is 5.3.7.20-SNAPSHOT, so to build it, and tag it as “lucee-53720”, we will set the build-arg “LUCEE_VERSION=5.3.7.20-SNAPSHOT” as shown below.
Please note that the command was broken into multiple lines here for better readability, but that is not required. Also, I use here the \ at the end of each line in order to keep the multiple lines as a single command (on Windows you would use the ^ symbol), so be sure to remove it if you type it all on one line:
docker image build . \
    -t isapir/lucee-53720 \
    --build-arg LUCEE_VERSION=5.3.7.20-SNAPSHOT
The same build process happens as before, but now the specified version is downloaded and built into the image.
Let’s spin up the image and test it out by running the docker container run <options> <image-tag> command. I will map the TCP port 8080 on my machine to port 8080 of the Docker container, and give the container the name “lucee-8080” rather than get a random name or have to refer to it by its hash. I will also use the option --rm to remove the container once it’s stopped:
docker container run --rm --name=lucee-8080 -p 8080:8080 isapir/53270
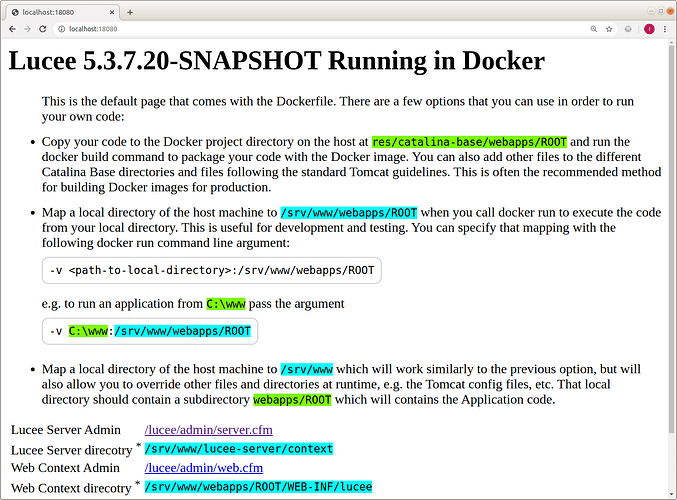
That will launch the container and you should see the output in the console. Pointing a web browser to http://localhost:8080/ will show the project’s welcome page:
Let’s stop that container by hitting CTRL+C in the console window. Since we used the --rm switch the container is removed and we can reuse its name if we want.
Setting the Lucee Admin Password
To set the Lucee Admin Password at build-time simply add a build-arg, e.g. to set the password to “changeit”, add the following arg:
--build-arg LUCEE_ADMIN_PASSWORD=changeit
Now when you visit the Lucee Admin you will be able to log in with that password - don’t forget to change it ![]() - rather than be asked to set a password by saving a file to the Lucee Server directory.
- rather than be asked to set a password by saving a file to the Lucee Server directory.
Adding Lucee Extensions at Build Time
Adding extensions is equally easy. The required information here is the extension’s ID (which is a UUID), which can also be obtained from the Lucee Download page or the Lucee Admin. For example, the ID for the “MongoDB Datasource and Cache” extension is “E6634E1A-4CC5-4839-A83C67549ECA8D5B”. You can add it at build-time using the build-arg below (the name and version are optional):
--build-arg LUCEE_EXTENSIONS="E6634E1A-4CC5-4839-A83C67549ECA8D5B;name=MongoDB;version=3.4.2.59"
To add multiple extensions, separate them with a , and ensure that the extension ID is the first element in that comma-separated list.
Now if you build the image and then run it, you can log into the Admin and see that the MongoDB extension, which is not installed by default, is indeed installed and ready to use as soon as the container starts.
Adding Your Application Code
There are two approaches to adding your application code:
-
Copy it into the image. The code then becomes part of the image and can not be easily modified. This approach is usually taken when building an image for production deployment. If you choose this approach then copy your code into
<working-directory>/res/catalina-base/webapps/ROOT. -
Map a directory from your local drive onto the Docker container when you start the container. This approach is great for development as you can make changes on your local directory using your favorite text editor and it is updated for the container automagically.
We will focus here on the second approach.
Mapping a Local Directory to the Container
Mapping a local directory is done by adding the -v <local-directory>:<container-directory> switch to the docker container run command.
The <container-directory> for the web root is at /srv/www/webapps/ROOT, so if for example, if the local directory of your application code is on your hard drive at /webapp then you would add the switch -v /webapp:/srv/www/webapps/ROOT so the complete command would be something like:
docker container run \
    --rm --name=lucee-8080 -p 8080:8080 \
    -v /webapp:/srv/www/webapps/ROOT \
    isapir/53270
And of course you can use all of the other options that docker container run command offers, like running in detached mode using the -d switch, setting environment variables using the -e switch, etc.
Tip: if you want change the settings for Tomcat then simply map the local directory to the path /srv/www/ on the remote directory and follow the Catalina Base conventions. If you do that, be sure to have your app code in the subdirectory webapps/ROOT.


